
How to Purchase Travel Insurance : The Easy Way
Purchase travel insurance? Do I really need to? Yes! We all love those sunset beach photos. But it’s really important to make sure things go okay, even when they don’t go okay. I’m going to show you how to purchase travel insurance using Travel Insurance Master. It’s super easy and all the filters make sure you choose the insurance that’s best for you.
*Some links in this post are affiliate links, which means that if you click a link and complete a purchase, I may receive a small commission at no extra cost to you. I appreciate your support of PXD! Read my full disclosure here. This post in no way recommends any particular brand/plan of travel insurance. Travel Insurance Master is a tool that allows you to choose the right travel insurance plan for you.
If you’re interested in seeing what travel insurance actually covers for your specific trip, click here.
Step 1: Enter Your Trip Info
This is where you fill in all your basic information to start your quote. Select your destination, then select your travel dates and trip cost. Decide if you’re quoting insurance for the whole trip total or “per traveler”.


You will also need to add the number of travelers, along with their personal information. This includes their date of birth, current country and where they live in that country.

After that, put in your initial deposit date (when you first put down money on your trip) and your final payment date. If you have not yet paid your final trip balance that is fine. Check the box for “I have not yet made my final payment.” Then click on “Get Quote.”

Step 2: Get Your Quote
All the information that you just inputted will now be at the top of your screen. This includes your destination, dates and some of your personal information.

Below your personal information you will see some of the plans as well as a plan that Travel Insurance Master recommends for you. Use the bottom scroll bar too. There are a lot more plan choices that you won’t see unless you scroll across.

Step 3: Narrow Down Your Options
Look to the left of your screen to see all the different filters. These show items covered by your travel insurance plan. Play around with the filters to choose plans and narrow down what’s important to you.
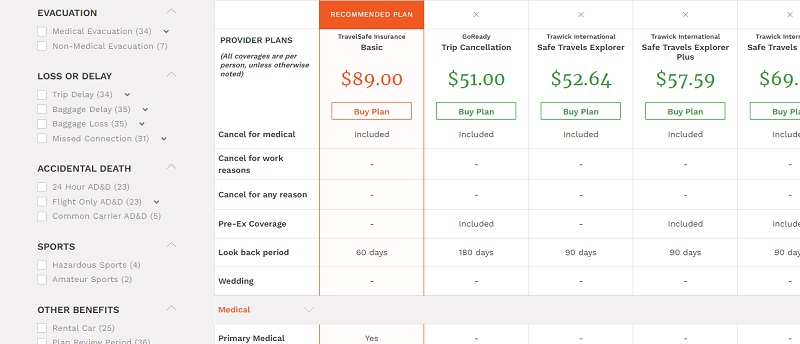
Another way to narrow down plans is to click the X at the top of each plan that you don’t want. This will hide that plan from view. Above the list of plans, you will see the total number of plans and which ones are hidden. You can also restore hidden plans.

Step 4: Understand Coverage Plan Details
One thing I like is that if you have a question about a specific item on any particular plan you can click on it and it will give you a description of the coverage.

Adjust filters to narrow down what your plan will cover. You can choose baggage loss, for example. But you can also choose up to how much you will be covered.

Then you go on over to each individual plan and see which ones match the coverage you’re looking for. Some provide more or less depending on the plan. This will also change the price for plans. If you’re opting for more coverage the price will increase.

When looking at specific plans click on plan details to put everything out in front of you. This makes it easier to see all the different features of each individual plan.

Step 5: Purchase Your Travel Insurance Plan
Once you’ve narrowed it down click “Buy Plan”. From there you’ll be asked to enter in your personal information. Then you can purchase it with your payment method.


Was this post helpful? Are you prepared for you next trip? You will definitely save yourself a headache if you purchase travel insurance!
Are you ready to get a quote?! Click here.


Very helpful post – thanks!
Glad you enjoyed it!